Creating a Photoshop File for Notebook Front Covers
About our Small Spiral Notebooks
At Lois Legacy Art LLC, we create a large variety of small notebooks. We place our fine art reproductions, illustrations, and map prints on the front covers. This document describes in detail how to layout a Photoshop file to print eight front covers for a certain size of notebooks. It is one phase in the process of creating notebooks. You can learn more about creating spiral notebooks at: "Creating Spiral Notebooks". To request information about the availability of these notebooks and other art, email info@loislegacyart.com or visit www.LoisLegacyArt.com.
The steps in this document are also covered in this video:
Example Front cover layout
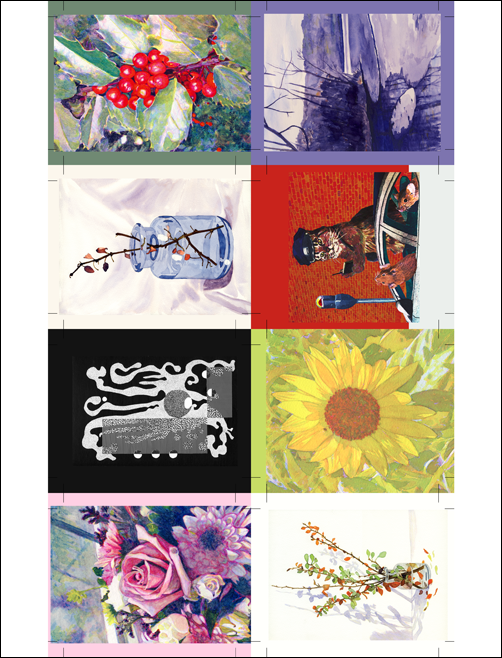
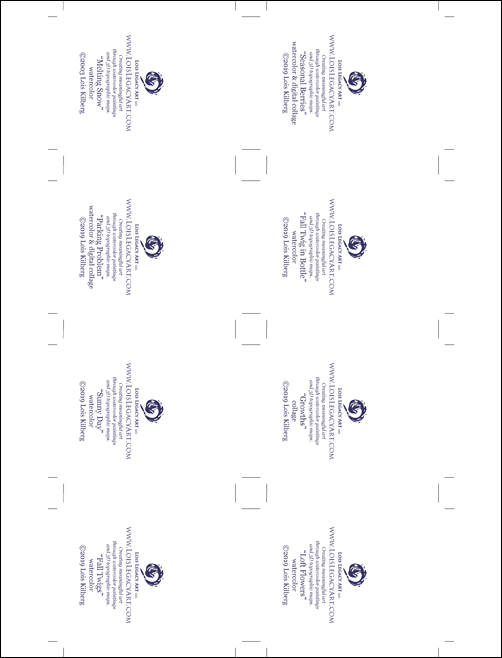
When you finish the steps in this document, you will have a test printout that looks similar to the pictures below. You will print on both sides of a single sheet of paper. The pictures show each side of the same piece of paper.
Spiral Notebook Specifications
This document describes the multiple cover layout for #2 Tiny notebooks that have a trim size of 2-1/8” x 2-3/4”. We assume a bleed of 1/4” all around. The orientation is for vertical images, and the wire spiral placement is at the top. You will be able to fit eight covers on a single sheet of paper.
Please note that the steps to create the front cover layout are the same whether the notebook thickness is Slim or Thick.
Requirements
- Computer running Photoshop (we use Adobe Creative Suite CS4 for Windows 10)
- Eight individual files for the images in the correct format
- Eight individual files for the inside information in the correct format
- Printer that you will use to create the front covers (we use an Epson Workforce WF-7210)
- Regular paper for a test print, at least one sheet but maybe more if adjustments are needed
- Strong light source easily reachable in a darkened room, for checking the test printout
Sections in This Document
The steps to create the front cover layouts are covered in the following sections.